Wiring Diagram Of Mercury Vapour Lamp
The Mercury Vapour Lamp

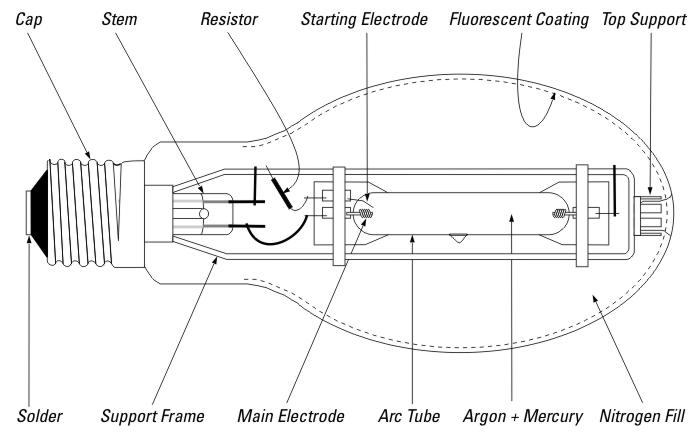
Internal Circuit Mercury Vapor Lamps Download Scientific
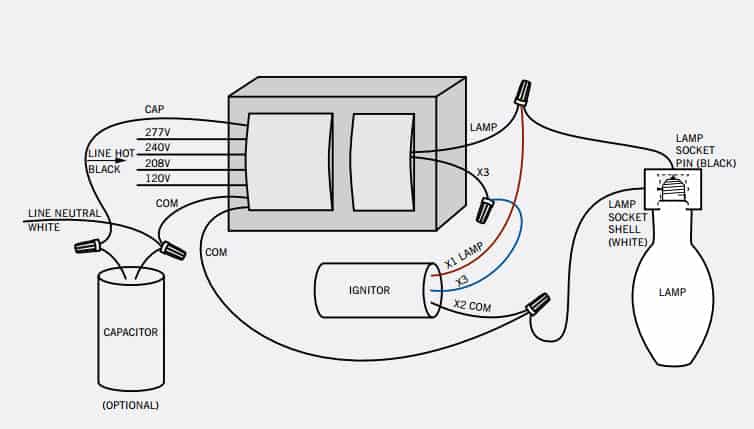
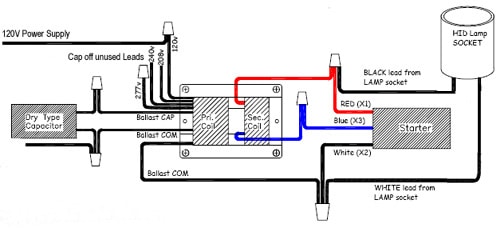
Mercury Vapor Ballast Wiring Diagram

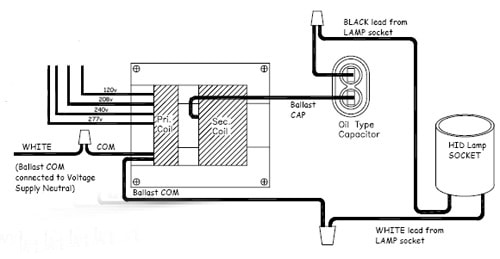
Plug it into an outlet and take measurements of the voltage that goes between the capacitor lead that is black and the com.
Wiring diagram of mercury vapour lamp. Testing the mercury vapor lamp. Again transition of the electrons requires least amount of input energy from a colliding electron. Our led corn bulb have the driver internally re wired the external driver see figure 4. A ground connection must be made to all ballasts to avoid shock hazard personal injury or damage to the luminaire or installation.
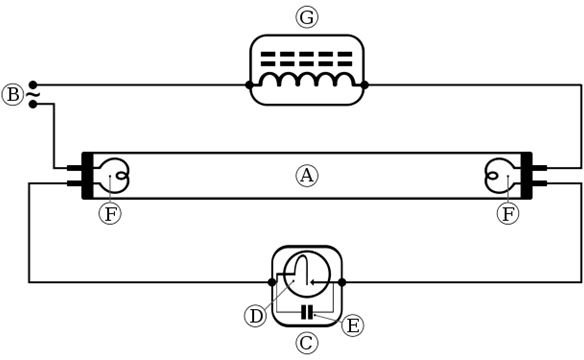
Mercury vapor and 175w metal halide wiring diagram with optional photocell. For the external driver lamp these are not our normal corn lights. Corn light wiring instructions with ballast bypass diagrams. In case of fluorescent lamp the mercury vapour pressure is maintained at lower level such that 60 of the total input energy gets converted into 2537 nm single line.
Turning off power at the circuit breaker is best practice 2. 1901 the first commercial mercury vapor lamp peter cooper hewitt new york city had a history of innovations in other fields and when he set about on the project of the mercury vapor lamp in 1898 it only took 3 years to develop the first reliable lamp with a acceptable color of light. You should now test the mercury vapor lamp. This will tell you whether the lamp and the capacitor are good.
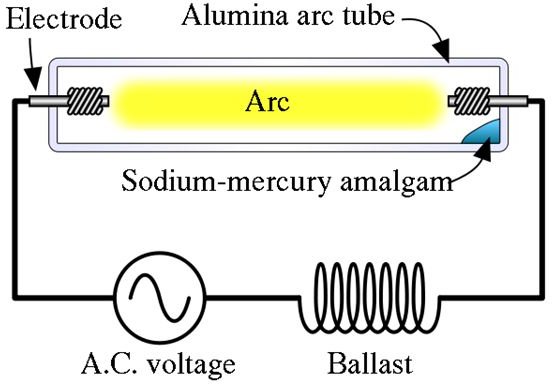
Instead of a near vacuum the mercury vapor light has a fill gas pressure close to that of surrounding air and the gap between the electrodes is much much smaller. Turn off the power switch. The voltage should read 15 vac but it should ramp up to 130vac within 5 to 10 minutes. As pressure increases the chance of multiple collisions gets increased.

Sodium Vapor Lamp Stpatricksday2018 Info
Mercury Vapor Ballast Wiring Diagram

Different Type Of Lamps For Luminous Electrical Notes

Internal Circuit Mercury Vapor Lamps Download Scientific
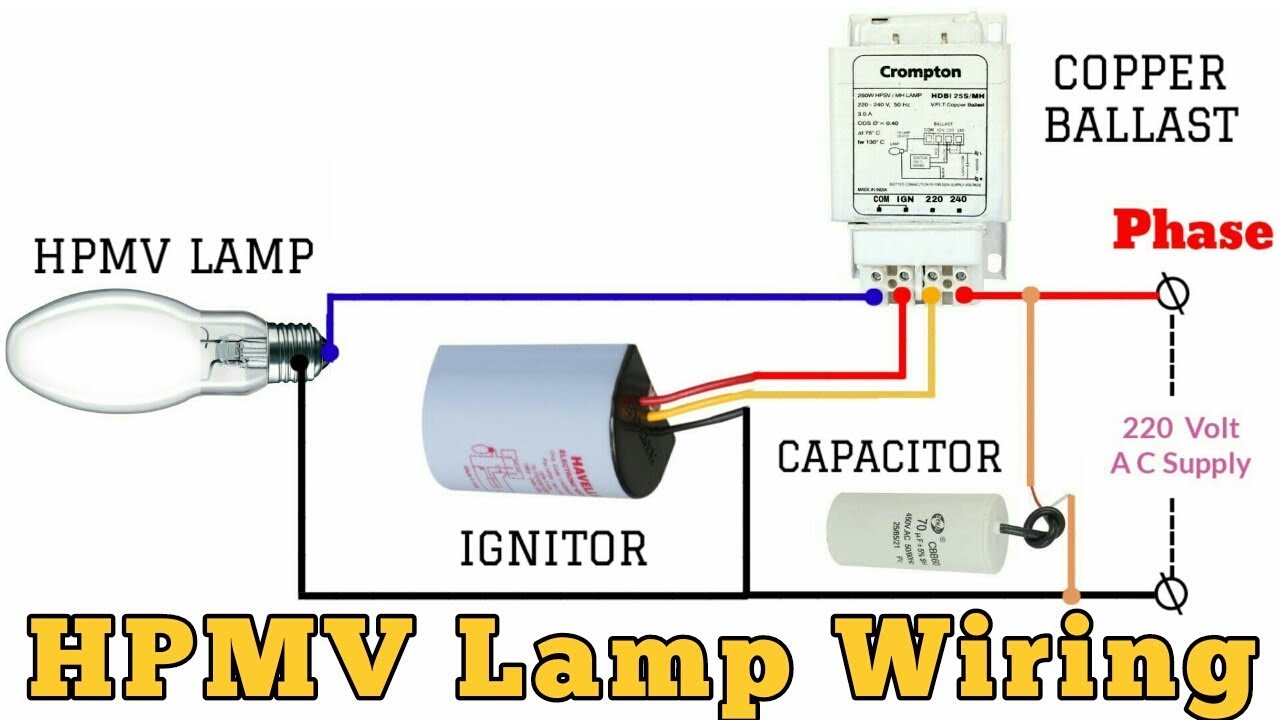
Hpmv Lamp क व यर ग क स कर Lamp Connection With Ballast And Ignitor Electrical Technician

Mercury Lamp Wiring Diagram Wiring Diagram

Working Principle Of Mercury Vapour Lamp In Hindi Mercury Vapour Lamp Connection
Mercury Vapor Ballast Wiring Diagram
Wiring Diagram For Mercury Vapour Light Wiring Diagram

Mercury Lamp Wiring Diagram Wiring Diagram

Mercury Vapor Ballast Wiring Diagram Fwscourts

Mercury Vapor Lamp Ballast Lifehigher Co
What Are The Different Types Of Light Bulbs
Wiring Diagram For Mercury Vapour Light Wiring Diagram

Mercury Vapour Lamp Electrical4u

Mercury Vapour Lamp Electrical4u

Mercury Lamp Circuit Diagram Fwscourts Org

6 Structure Of A High Pressure Sodium Vapor Lamp Download
